Showing posts with label home-cooked. Show all posts

Monday, June 13, 2016

Adobo, ang pambansang ulam. Bow!

I'd say Adobo is one of the first dishes I learned to cook. It's a pretty easy recipe to follow and each household would have a different version of it. My mom's is pretty straightforward and on the sweet side. My mother-in-law boils her meat is the sauces, fries them then adds the sauce again. A little bit time consuming but really tasty.

Of course, I've tried both recipes time and again. I thought of adding another version under my arsenal and it is a hit. My version of adobo sa gata. I remember having tried this dish back in college at an Adobo Republic branch along Katips. My version has a little bit more sauce because my family loves sauce so I adjust to make them happy. Cooking, after all is another way to say how much I love them.

Here's my recipe.

1 kg of pork belly (about two inch slices)
1 kg chicken legs (thighs and drumsticks)
1 niyog
1 cup red cane vinegar
1 cup soy sauce
1 tbsp brown sugar
1 tbsp salt
1/2 tsp pepper
2 pieces siling haba
2 tbsp oyster sauce
2 potatoes
1 kamote (optional)
6 cloves garlic

I used that kamote because it has been in the fridge for weeks. I didn't want it to go to waste. It was my first time to put kamote in adobo and it turned out ok. I put in the pork at the bottom of my pot, then the chicken, garlic, potatoes and kamote. Then I put in the seasonings, soy sauce, vinegar, pepper, sugar, oyster sauce then let simmer. I held the salt towards the end to make sure I only put enough since I already have soy and oyster sauce in the mix. After about 20 minutes of simmering, I then put the milk from one mature coconut (niyog) and let the sauce reduce, which would take another 10-15 minutes on high. I throw in the siling haba in there too.


My version of adobo sa gata

The picture does not look as appetizing but my family likes this recipe. I also normally remove the chicken skin to reduce the fat in the dish. This is as easy as your normal adobo. The only "hard part" for me is squeezing the milk out of the shredded coconut meat. If you buy your niyog in the wet market, some could sell you the coconut milk with extra (minimal) cost for the labor. I prefer doing it myself though. You can also buy in the canned coconut milk/cream in the grocery store. But I tell you, it's different if you use the canned lot. Fresh is better.

So what do we do with 2 kgs. worth of ulam? We keep some in the freezer. Ang adobo, habang tumatagal, lalong sumasarap ;) We just pop it in the microwave on days when I don't feel like cooking.

Here you go. Another fast and easy twist to your usual go to dishes. Enjoy!

Sunday, June 5, 2016

Homecooked: Pasta con Sarde and turmeric chicken

Every now and then, I would be inspired to whip up some new recipe in the kitchen. This is mostly inspired by something that is expiring in the pantry that I need to cook creatively. Hahaha! I had some parmesan cheese and linguine that has been in the cabinet and fridge for the longest time. I checked, they weren't expired yet but I do need to use them soon to avoid wastage.

I bought some cherry tomatoes and fresh basil at the Sunday market, then cooked this simple pasta with sardines dish.

Here are  the ingredients.

about 400 g of linguine cooked according to package instructions
butter
olive oil
6-8 cloves of garlic (more if you like), chopped
bottle of Spanish style sardines
about a cup of fresh basil leaves
8-10 cherry tomatoes cut in two

So I asked my husband to buy the sardines at the nearby grocery. He asked me what kind, in oil or the Spanish style. I got a little bit confused since I cooked a similar dish in the past (minus the vegetables) so I thought he should know. I said Spanish style, in the bottle. 

He said he didn't hear me say the last part (bottle) because he brought home 555 Spanish-style sardines. He says he didn't see the bottled kind. Sure...mostly likely, he didn't really look since he didn't hear me say bottled, right? I would have gone myself but I was already starting with the noodles and preparing the other ingredients since it was almost lunch time. Anyway, he did offer to go back and look for the ones I requested originally. I said I will just work with what we have since it's already there. In fairness, it turned out ok. I feel though that the bottled sardines are more tasty and packed compared to the canned type though of course it is more expensive. I still prefer the bottled kind for this recipe.

Here's how I made do with the sardines I had. I sauteed the garlic in butter and olive oil. I probably used 1/4 cup of the butter and oil (combined). You can add some more olive oil later if you feel the pasta is too dry. I then added the cherry tomatoes and let it cook for about 2 minutes. Next, I added the pasta. Make sure to mix everything well. Then add the basil leaves.


Pasta con sarde

Pasta con sarde with a side of turmeric chicken
I thought of cooking something on the side to pair with the pasta. I didn't really have too much time to think about it so I thought turmeric chicken would be fine. I just fried chicken thigh fillet that I rubbed with salt, pepper, turmeric and garlic powder.

Simple and fast recipe that can be enjoyed by the young and old :)

Saturday, April 23, 2016

Homemade: Toasted Sesame Mayo Dressing

I like Goma, the roasted sesame mayo dressing. I've only ever seen the Kewpie variety in the grocery and it can be quite expensive. The smaller bottle costs almost 200 pesos while the biggest one about 500. I thought homemade will probably be cheaper so I tried making it myself. It was a success, if I may say so myself. 

Here's the recipe I followed:

2 tbsp Kewpie mayo
2 tbsp ground  toasted sesame seeds
1 tbsp sesame oil
1 tbsp vinegar
1 tbsp soy sauce
1 tbsp sugar

I toasted grocery bought sesame seeds using a non stick pan then ground them. I think you can buy ground sesame but the freshly toasted one made a difference . Just mix every thing, it's that easy. This recipe makes about 2 servings. I made about 8 servings in one batch and stored it in a jar in the fridge.

I used the 1/2 fat Kewpie mayo variety and I couldn't tell the difference with regular mayo. For a lighter version though, you can also try using yogurt. Of course expect to taste the difference. I'll try that next time and give an update.

Ingredients

Finished product

This bottle is about 200ml. This amount cost me about 100-120 pesos to make. Cheaper and tastier than the store bought goma that costs about 200+ for 250 ml bottle.

Enjoy this with your salad. You can also use as a dip for julienned cucumber, carrot, and turnip for your healthy snack. 

Friday, April 1, 2016

Home cooked: Beef con Ampalaya with tausi

I bought ampalaya so we have veggies for dinner when my mom came over to attend my son's moving up day. We ended up doing something else so it got stuck in the fridge for a couple of days. I thought to whip up this recipe instead of the original plan I had of just sauteing it with egg.

Again, this was my first time to cook this so I just followed the recipe I found on the internet. 

Here's the ingredients:

2 medium sized ampalaya (bitter gourd), sliced
about a cup of black beans (Tausi)
2 tablespoons corn starch diluted in water
onion and garlic for sauteing
half kilo of beef sirloin cut into strips
2 tbsp oyster sauce
2 tbsp soy sauced
salt and pepper to taste

What I normally do when I cook ampalaya is to soak it in water with some salt to lessen the bitterness. Got this tip from my mom. Others advise to blanch or pre-boil it but I feel that it takes away the nutrients if you boil it first.

Here's the cooking prodecure. Marinade the sirloin strips in soy sauce for about 10-15 minutes. When ready, saute garlic and onions then add the drained sirloin tips. Put in tausi and bring to a gentle boil. Add amplaya and about 2 cups of water, then cover to boil. You can then add some soy sauce and oyster sauce to the mix. Taste. Add pepper and some more salt to adjust saltiness to your liking. Ampalaya takes some time to cook. Just a few minutes before it is done though, start adding the cornstarch to thicken the sauce. 

This is a pretty easy dish that serves 5-6 persons. Enjoy!


Beef con Amapalaya with Tausi


Thursday, March 24, 2016

Home cooked: Pad Thai recipe

Since I left my corporate job, I have been experimenting a lot more in the kitchen. One of the things I wanted to try cooking at home was Pad Thai. I saw this one pot recipe from Tasty.com and it seemed pretty easy.

Boy, was I in for a surprise. I am not sure if it was the heat but I actually got tired preparing all the ingredients. I feel that it could have been more simple if I just sauteed everything instead of frying the egg, tofu and chicken breast separately. 

Yes, I deviated a little bit on the recipe I saw online. I added tofu, removed sriracha (because I have a kid to serve too, but really because we didn't have it in the pantry), did away with rice vinegar and used cane vinegar and a little bit of cooking wine instead.

Here is the full list of ingredient I used:

2 chicken breasts cut into strips 
4 small blocks of tokwa/firm tofu, chopped into small cubes
about 2 cups of bean sprouts
2 eggs beaten
spring onions
red onion (use shallots if you have it in your pantry)
garlic
400 g pad Thai noodles
sesame oil
olive oil
1/3 cup chopped peanuts

For the sauce:
1 lime
1/3 cup red cane vinegar
1/4 cup cooking wine
1/3 cup fish sauce (patis)
1 knorr shrimp cube
chili flakes (optional) 
1/3 cup brown sugar

I basically followed the instructions on the video. I first cooked the noodles according to package instructions. Drain and set aside. Using the same pan, add about half a teaspoon of sesame oil and some olive oil and cook the chicken breast. Once done, set aside. I did the same to the tokwa. Then, I fried the scrambled eggs. After that, I sauteed garlic and onions. I put in the green onions and bean sprouts into the mix. I later tossed the chicken, scrambled eggs and tokwa into the pan as well. Then, add the cooked pad thai noodles.

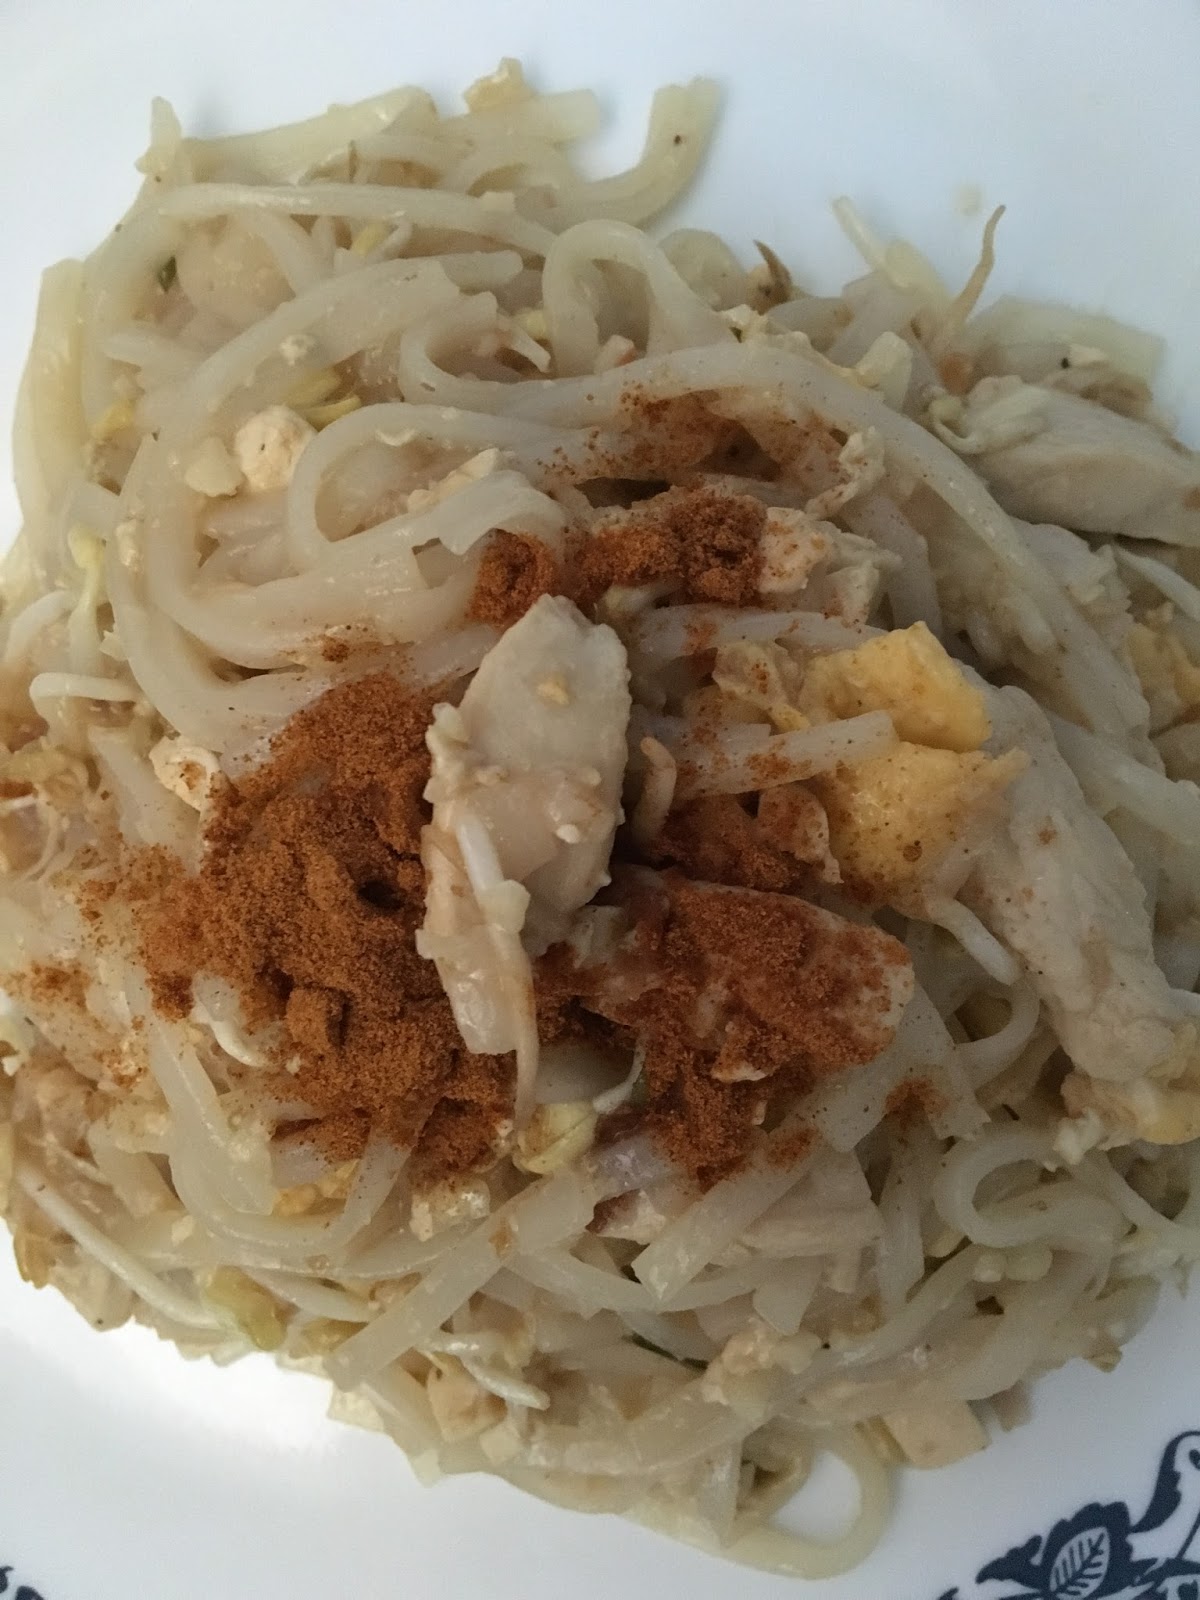
For the sauce, mix all the ingredients and pour over the pan. Then add peanuts. You can adjust the taste to your liking. The finished product looked a little pale than the usual pad thai we get at restaurants. People at home did say it was good. At least all the hard work was paid off with their compliments.

I added the chili powder (we did not have chili flakes at home) to my plate as each one of us at home had our own level of tolerance for spice.


Homemade Pad Thai with Chili powder

There you go. Do not hesitate to substitute ingredients that you already have in your pantry for recipes you see online. Enjoy!

Monday, October 14, 2013

Recipe: Sauteed Kale and Tofu

This recipe is packed with protein both from the tofu and kale. Bountiful with vitamins and minerals, kale is the new super food. It helps lower cholesterol and fight at least 5 types of cancer. A cup of chopped raw kale only has 33 calories and packs 206% daily value of Vitamin A and 134% DV of vitamin C.

We normally steam a few leaves for the baby and give it to him with his favorite sweet potatoes. We used to mash it in when he was younger but now that he has more teeth, we just sandwich it in between slices of steamed sweet potatoes. We cook the rest for the adults.

This recipe serves one. Just multiply the number of servings you want to the ingredients for your purpose.

Ingredients:
1 block of tofu chopped
About 200 g of kale
Chopped onions
Chopped garlic
Rice wine
Salt and pepper
Oil or butter (I used about a tablespoon of butter)
Dash of cayenne and paprika (optional)

Saute garlic, onion and tofu. Add the chopped kale. You can add a little bit of water if you want. I used a little rice wine to give it a little moisture and sweetness. Then, put a dash of salt, pepper, cayenne and paprika. I love my food to have a little kick to it so you would find most of my recipes to have cayenne and paprika. This recipe should be good for dieters. Very low in calories (replace butter with olive oil or just water if you like), high in proteins and power packed with a whole range of vitamins and minerals. Enjoy!


Sunday, October 13, 2013

Recipe: Creamed Spinach

I tried this recipe I saw on Kitchen Boss on TLC. I tweaked it a little to fit what I already have in my pantry, I think Buddy (Yup, same guy on Cake Boss) used more ingredients than I did.

Ingredients:
Spinach
Button mushrooms
Cream
Garlic
Onion
Olive oil
Dash of salt and pepper to taste

Boil the spinach first and strain. Cut it coursely then set aside. Saute garlic, onion and mushrooms. Add the spinach and the cream. Put a dash of salt and pepper to taste. So simple!

My picture doesn't look too appetizing but this is quite good. It should go well as a side to grilled pork chops or steak.


Try it, this weekend Mommies! Let me know how it goes :)

Saturday, October 5, 2013

Recipe: Spinach and Kale Omelette

How do we recycle leftovers? Why, include it in your omelette, of course! For this recipe, I used left over spinach and I included old kale leftover that was meant to be steamed for my baby to eat for the week.

Ingredients:
Eggs (I used 3 here)
Left over spinach
Chopped kale
Tomato
Garlic
Onion
Cheese (optional-advise is for dieters)
Cooking oil

Saute garlic, onion and tomato. Add the kale. Once partly cooked, add the spinach. Set aside. I normally use the same pan to cook the eggs (bawas hugasin). Beat the eggs, season with salt and pepper. I added a dash of cayenne and paprika but this is optional. Put oil on the pan and add the eggs. Once half cooked, put the filling on top preferably to one side to make it easier to fold later on. Add your cheese too. Then the tricky part , folding your omelette. I normally botch this part but I got lucky this time.


This was the healthy part of our breakfast. We had hotdogs and fried rice with this. 


Let's eat!